Custom Components GalleryNEW
ExploreDeveloping Faster with Auto-Reloading
Prerequisite: This Guide requires you to know about Blocks. Make sure to read the Guide to Blocks first.
This guide covers auto reloading, reloading in a Python IDE, and using gradio with Jupyter Notebooks.
Why Auto-Reloading?
When you are building a Gradio demo, particularly out of Blocks, you may find it cumbersome to keep re-running your code to test your changes.
To make it faster and more convenient to write your code, we’ve made it easier to “reload” your Gradio apps instantly when you are developing in a Python IDE (like VS Code, Sublime Text, PyCharm, or so on) or generally running your Python code from the terminal. We’ve also developed an analogous “magic command” that allows you to re-run cells faster if you use Jupyter Notebooks (or any similar environment like Colab).
This short Guide will cover both of these methods, so no matter how you write Python, you’ll leave knowing how to build Gradio apps faster.
Python IDE Reload 🔥
If you are building Gradio Blocks using a Python IDE, your file of code (let’s name it run.py) might look something like this:
import gradio as gr

with gr.Blocks() as demo:
    gr.Markdown("# Greetings from Gradio!")
    inp = gr.Textbox(placeholder="What is your name?")
    out = gr.Textbox()

    inp.change(fn=lambda x: f"Welcome, {x}!",
               inputs=inp,
               outputs=out)

if __name__ == "__main__":
    demo.launch()
The problem is that anytime that you want to make a change to your layout, events, or components, you have to close and rerun your app by writing python run.py.
Instead of doing this, you can run your code in reload mode by changing 1 word: python to gradio:
In the terminal, run gradio run.py. That’s it!
Now, you’ll see that after you’ll see something like this:
Watching: '/Users/freddy/sources/gradio/gradio', '/Users/freddy/sources/gradio/demo/'

Running on local URL:  http://127.0.0.1:7860
The important part here is the line that says Watching... What’s happening here is that Gradio will be observing the directory where run.py file lives, and if the file changes, it will automatically rerun the file for you. So you can focus on writing your code, and your Gradio demo will refresh automatically 🥳
⚠️ Warning: the gradio command does not detect the parameters passed to the launch() methods because the launch() method is never called in reload mode. For example, setting auth, or show_error in launch() will not be reflected in the app.
There is one important thing to keep in mind when using the reload mode: Gradio specifically looks for a Gradio Blocks/Interface demo called demo in your code. If you have named your demo something else, you will need to pass in the name of your demo as the 2nd parameter in your code. So if your run.py file looked like this:
import gradio as gr

with gr.Blocks() as my_demo:
    gr.Markdown("# Greetings from Gradio!")
    inp = gr.Textbox(placeholder="What is your name?")
    out = gr.Textbox()

    inp.change(fn=lambda x: f"Welcome, {x}!",
               inputs=inp,
               outputs=out)

if __name__ == "__main__":
    my_demo.launch()
Then you would launch it in reload mode like this: gradio run.py my_demo.
By default, the Gradio use UTF-8 encoding for scripts. For reload mode, If you are using encoding formats other than UTF-8 (such as cp1252), make sure you’ve done like this:
- Configure encoding declaration of python script, for example:
# -*- coding: cp1252 -*- - Confirm that your code editor has identified that encoding format.
- Run like this:
gradio run.py --encoding cp1252
🔥 If your application accepts command line arguments, you can pass them in as well. Here’s an example:
import gradio as gr
import argparse

parser = argparse.ArgumentParser()
parser.add_argument("--name", type=str, default="User")
args, unknown = parser.parse_known_args()

with gr.Blocks() as demo:
    gr.Markdown(f"# Greetings {args.name}!")
    inp = gr.Textbox()
    out = gr.Textbox()

    inp.change(fn=lambda x: x, inputs=inp, outputs=out)

if __name__ == "__main__":
    demo.launch()
Which you could run like this: gradio run.py --name Gretel
As a small aside, this auto-reloading happens if you change your run.py source code or the Gradio source code. Meaning that this can be useful if you decide to contribute to Gradio itself ✅
Jupyter Notebook Magic 🔮
What about if you use Jupyter Notebooks (or Colab Notebooks, etc.) to develop code? We got something for you too!
We’ve developed a magic command that will create and run a Blocks demo for you. To use this, load the gradio extension at the top of your notebook:
%load_ext gradio
Then, in the cell that you are developing your Gradio demo, simply write the magic command %%blocks at the top, and then write the layout and components like you would normally:
%%blocks

import gradio as gr

with gr.Blocks() as demo:
    gr.Markdown(f"# Greetings {args.name}!")
    inp = gr.Textbox()
    out = gr.Textbox()

    inp.change(fn=lambda x: x, inputs=inp, outputs=out)
Notice that:
-
You do not need to launch your demo — Gradio does that for you automatically!
-
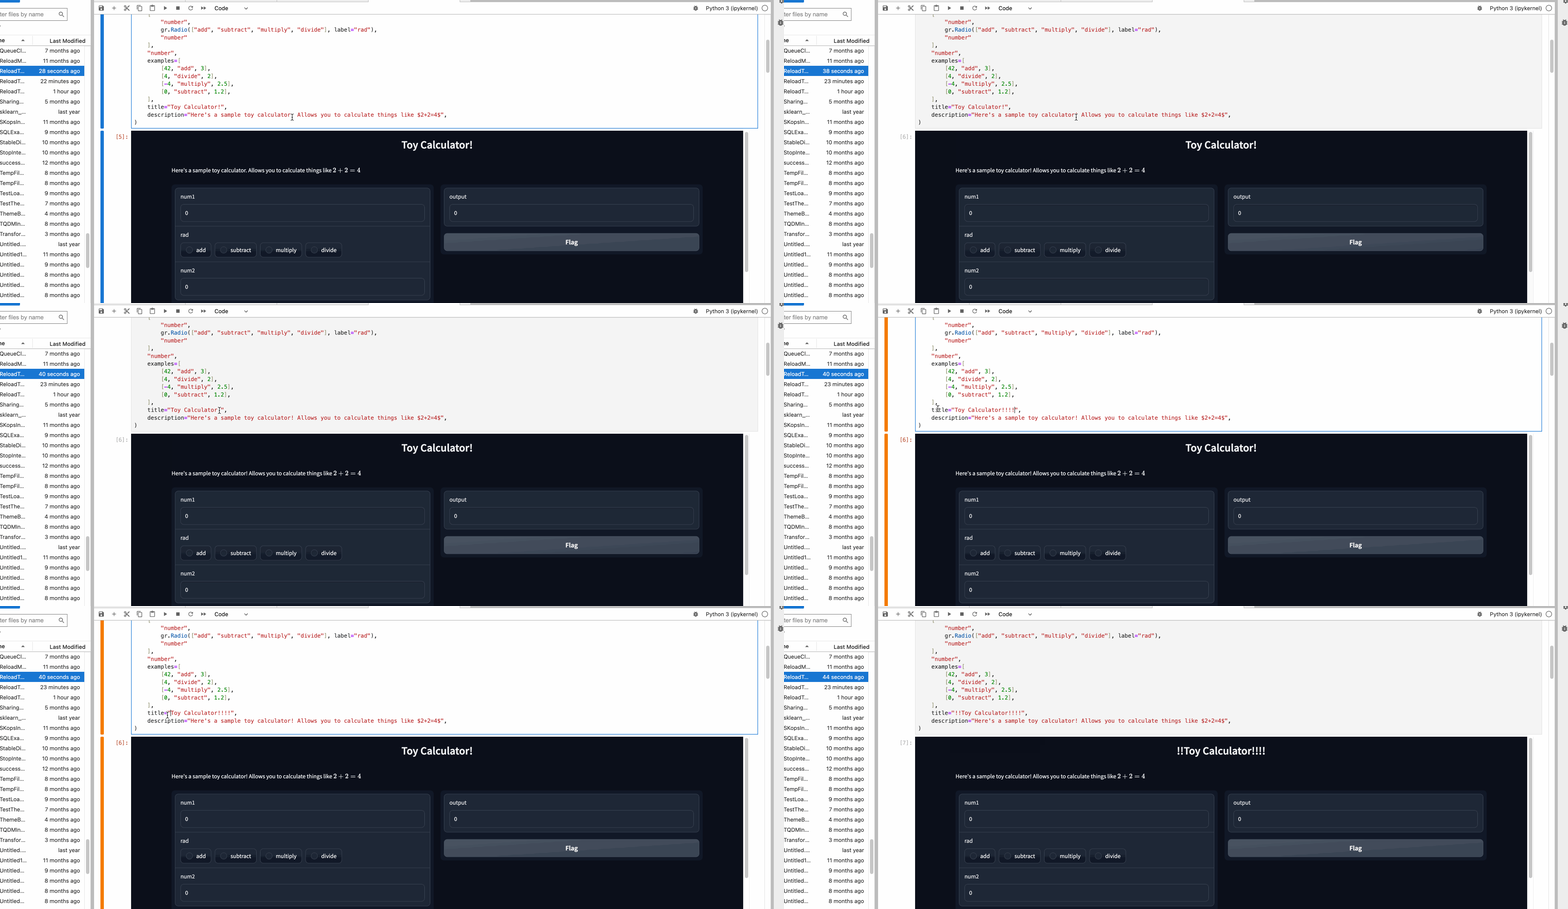
Every time you rerun the cell, Gradio will re-render your app on the same port and using the same underlying web server. This means you’ll see your changes much, much faster than if you were rerunning the cell normally.
Here’s what it looks like in a jupyter notebook:

🪄 This works in colab notebooks too! Here’s a colab notebook where you can see the Blocks magic in action. Try making some changes and re-running the cell with the Gradio code!
The Notebook Magic is now the author’s preferred way of building Gradio demos. Regardless of how you write Python code, we hope either of these methods will give you a much better development experience using Gradio.
Next Steps
Now that you know how to develop quickly using Gradio, start building your own!
If you are looking for inspiration, try exploring demos other people have built with Gradio, browse public Hugging Face Spaces 🤗